

13 Activities to engage your Toddler
As promised in one of my recent blogs, I came up with a list of activities that would help you in your journey of parenting a toddler.
If you’re a toddler parent and if you’ve been pulling your hair or scratching your beard to find effective ways to engage your little one, you’ve landed at the right place.
Before my tiny tot turned Two, I never gave it a thought. I assumed she’d find ways to engage herself, get tired and go to sleep when it’s time for bed. Uh-Oh! That’s every parent’s dream, isn’t it? Well, let’s get realistic.
Since I’ve understood that ideal children don’t exist and kids will be kids, I came up with a few DIY activities that would keep my darling engaged. Most of these activities only require stuff that you already have at home. So, Get, Set, Go!
These art activities encourage your child’s creativity, enhance hand-eye coordination, and enable the development of fine motor skills.
Not just that, your little one gets an interactive play time with you.
Disclaimer: This post might contain affiliate links. If you make a purchase with the links provided, I receive a commission at no additional charge to you. Thanks for your support.
1. Play dough
Things you need:
All purpose flour – 1 cup
Table salt – ½ cup
Coconut oil – 2 tbsp
Water – ½ cup
Food colors (or) Water colors (or) Acrylic paints
Cookie cutters
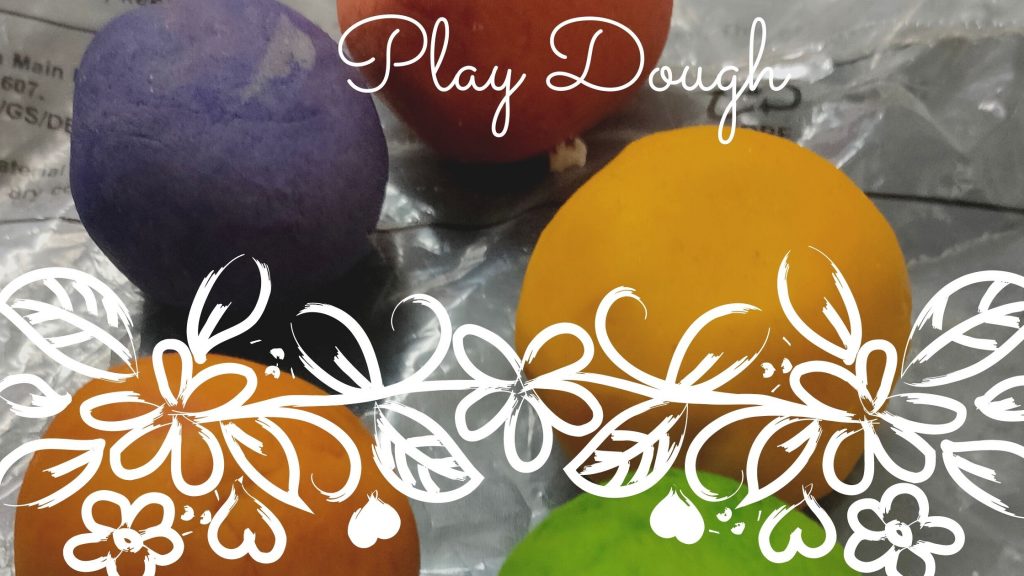
Recipe:
- Mix all the ingredients in a bowl (excluding colors). Knead it into a dough.
- Cut the dough into smaller balls.
- Add different food colors to each ball and Ta-DA! Your play dough is ready.
Make sure your little one is dressed up in old pajamas that’s okay to become messy. Else, use an apron.
Let them use cookie cutters to make different shapes.
You’ll be surprised to see them getting creative and experimenting with all the colors and shapes.
NOTE: Don’t let your OCD get in the way. It’s okay if the end result is gross. There’s no harm. (I’m telling myself as I type this. Ha-ha!)
2. Leafy Tree
Things you need:
Paper
Leaves & Flowers (you can also pick them from your garden)
Gluestick (or) Cellotape
Pen (or) Sketch
Crayons (or) Color pencils
- Take your toddler for a stroll in your garden or sidewalk and let them choose which leaves and flowers they want to pick.
- Take a sheet of paper.
Draw the trunk of a tree and a few branches with a pen/sketch. - Color the trunk and branches with crayons/color pencils.
- Stick the fresh leaves and flowers from your garden with the help of a glue stick or cello tape. Alternately, you can use these artificial leaves and flowers if you want to save your kids artwork for a longer time.
It doesn’t have to be perfect. Let them get creative. You never know when those unique designs become masterpieces.

NOTE: If you want to save this to your child’s art folder, make sure you dry it before storing it inside.
Alternatively, you can use dried leaves and flowers instead of fresh ones if you can’t dry the finished work.
3. Popsicle Photo frame
Things you need:
Popsicle sticks
Water colors (or) Paints
Fevicol (or) Thread
Card (or) Thick paper
Picture/ Message card
Magnet (optional)
- Take 4 Popsicle sticks and paint them in your favorite color. Let them dry.
- Stick them to each other so that they form a square shape.
- Cut a thick paper or card and stick it at the back with three sides glued.
- Leave one side open to insert a picture or a message card.
Your little Photo frame is ready. - You can stick a magnet at the back and display it on your fridge or cupboard. Be proud of your little one’s achievements!

NOTE: You can use more Popsicle sticks to play around with the sizes and shapes of your photo-frame.
4. Sewing Toy
Things you need:
Card stock
Single hole punch
Shoe laces/ Thread
- Cut the cardboard in different shapes that attracts your toddler.
- Punch holes all around, making sure that you leave enough gap from the edge to avoid tearing.
- Push in and pull out the thread through the holes to sew different patterns.
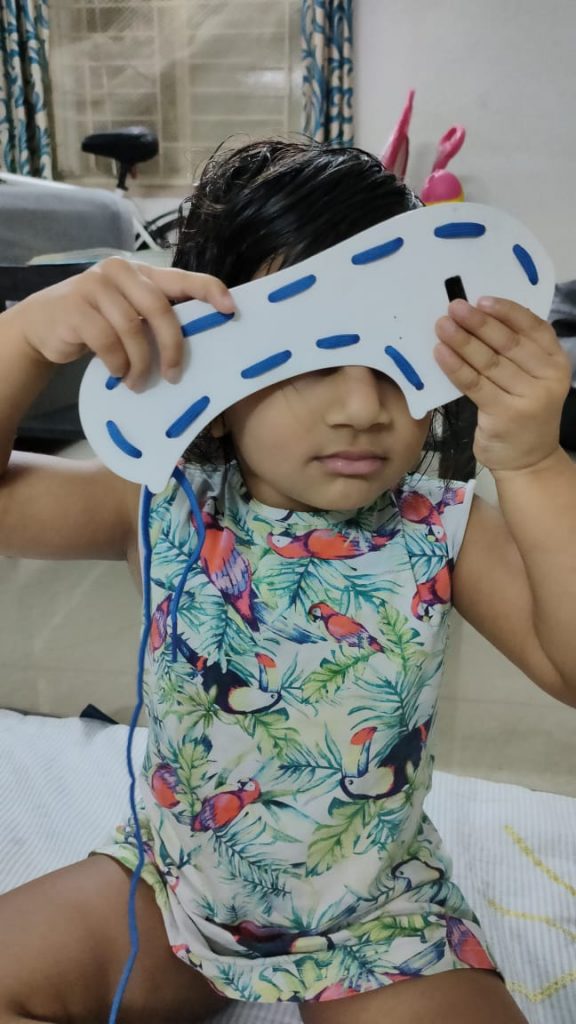
NOTE: Don’t expect your child to get what you think is the right pattern. Show them an example and be patient while they learn. Let them explore and make their own fantastic designs.
5. Woolly Sheep
Things you need:
Sheep Template print (alternatively, you can draw your own)
Puffed rice
Glue
- Draw the outline of a sheep/ Print a template.
- Apply a generous amount of glue over the sheep’s body and head.
- Pour some Puffed rice on it.
Voila! Your Baa Baa white sheep has 3 full bags of wool now.
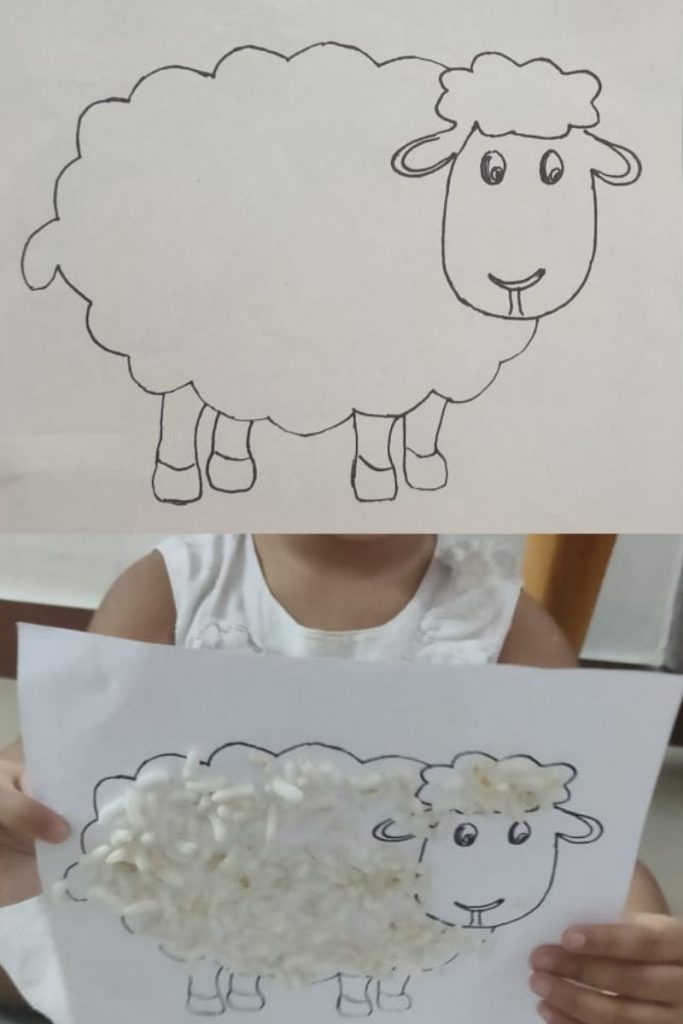
NOTE: An added advantage to this craft activity is that your toddler gets to munch on their snack while feeding the sheep. Haha!
6. Puffy Clouds
Things you need:
Paper
Sketch/Pen
Cotton
Glue
Paints(optional)
- Draw a cloud pattern on a paper.
- Apply some glue over the inside area.
- Take pieces of cotton and stick them on the glued area.
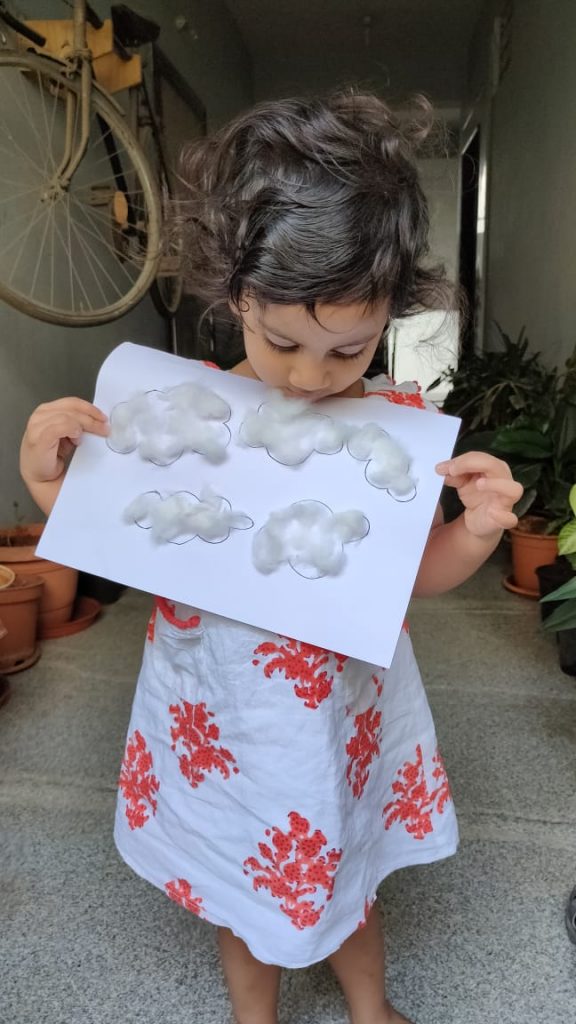
NOTE: You can also paint these puffy clouds in blue/grey to display a bright day or a rainy day.
7. Color sorting
Things you need:
Building blocks/ Pompoms
Color papers/ Color code bowls
- Give your child a whole lot of building blocks or colorful pompoms.
- Ask them to segregate each color and put them on the same color coded paper or in the bowl.
When they finish sorting all the colors, you can do a little happy dance together to make them feel accomplished.
NOTE: If they don’t get it right, you can say – That’s incorrect! But, please don’t snatch and try to get it right. After all they’re just learning and it isn’t a competition that earns them a medal.
8. Caterpillar numbers
Things you need:
- Write numbers and draw a caterpillar head next to each number.
- Keep adding circles to the body as the numbers increase.
- Apply glue on the circles and let your kid stick pompoms on them as they keep counting.
Happy number learning!
9. Water beads
Things you need:
Water beads
Water
Big bowl
- Let your child help you soak the water beads overnight.
- After getting up in the morning and finishing your daily routine chores, let them play with these colorful pretty crystals.
- They can also put in a few beads in your plant pots to keep your plants moist and fresh.
NOTE: This trick is helpful if you’re going on a vacation – It becomes a science experiment for the kids. They’ll be overjoyed to see the plants still green & thriving after days of no watering.
10. Save the Alphabet/Numbers
Things you need:
Magnetic alphabet (or) Magnetic numbers
Bath Tub (or) Large Bowl
Water
Scoop
Mug
- Fill the Bath-tub 2inch deep with water. Leave your loved one in a swim underwear.
- Throw in some magnetic or plastic alphabet/numbers.
- Give a scoop. Teach them how to scoop one alphabet at a time, drain excess water from the scoop and put the alphabet in the mug.
- Save all the alphabet from drowning.
11. Alphabet Cooking
Things you need:
Dish
Large spoon
Alphabet (or) Numbers
Since my little one wants to help me with cooking, I came up with this activity and she enjoys her lovely little daily chore.
She also gives me a little to taste and gets overjoyed when I tell her it’s yummy.
Let them cook their own yummy alphabet curry in a vessel.
12. Pasta Beading
Things you need:
Give some uncooked pasta in a bowl.
Show them how to thread them into a chain, and let them continue beading the remaining pasta in the bowl.
Once they’re done, tie it around their neck and appreciate them for making their own piece of jewelry.
13. Dip and Squeeze
Things you need:
Show them how a sponge absorbs water when soaked and how you can squeeze it out.
Let them have fun. If your kid enjoys water activities, like mine and most kids do, this activity keeps them engaged until you finally have to drag them out of it.
It’s going to get a little messy. So, be prepared for it.
I put my kid in the bath tub for this activity to avoid spilling on the floor.
You can also spread a rug beneath the bath tub to avoid spillage and skidding, thereby saving yourself from broken bones.
CAUTION: Monitor your child at all times for safety concerns.


